Using the IPMI (Intelligent Platform Management Interface) functionality provided by the Super Micro motherboard, you can basically configure the BIOS, install the FreeNAS OS and use your computer via a network connection. This avoids the need to hook a monitor and keyboard up to your server, it also allows you to mount an ISO as a virtual drive allowing you to install the OS incredibly easily. This post walks you through the process of installing FreeNAS using this method.
Required Software:
FreeNAS:
The latest stable release of FreeNAS from freenas.org.
SaltiNAS uses version 9.2.1.9 64-Bit
For remote connection to the Super Micro motherboard:
IPMIView from supermicro.com
v2.9.23 was used in the process below.
Outline of the installation
- Connect to server using IPMI
- Mount FreeNAS installation ISO as a bootable virtual drive.
- Install FreeNAS
- Reboot
- Login
- Victory Dance
Connect to the server using IPMI
- Connect the server to power and ensurr the motherboard is powered but not turned on.
- Connect LAN port 1 or the dedicate IPMI LAN port on the server to your network (must be DHCP enabled)
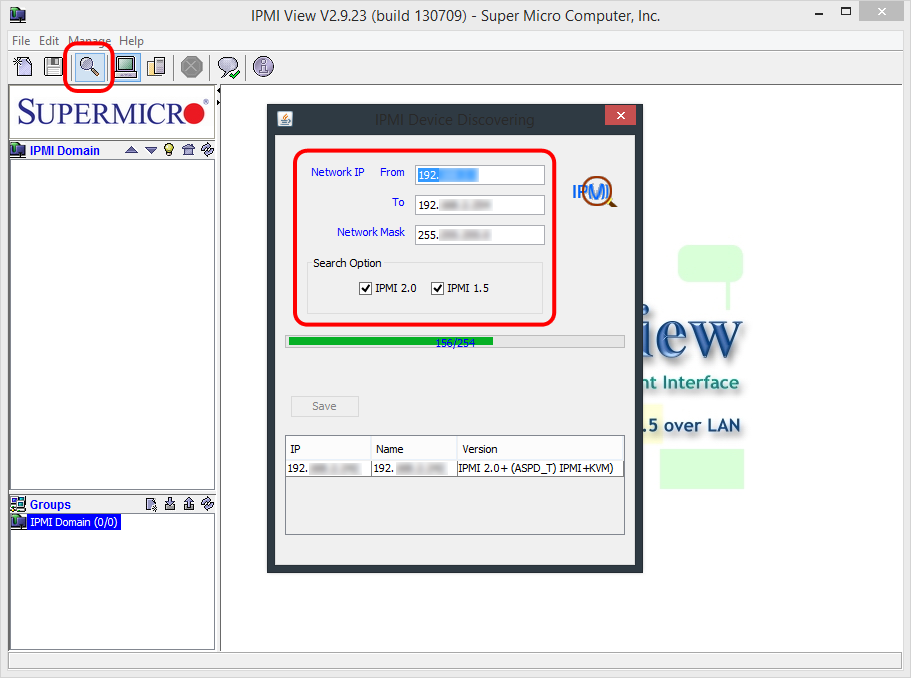
- Start IPMIView and scan your network for IPMI enabled devices.
- Click the “Find” button.
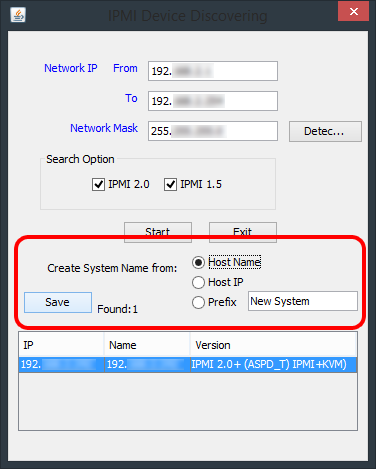
- Enter your network details then click the “Start” button.
- The device will appear in the results list with assigned IP.
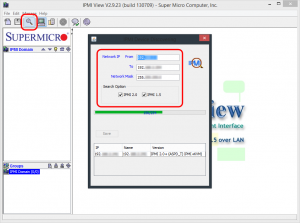
- Click on the device and “Save” it

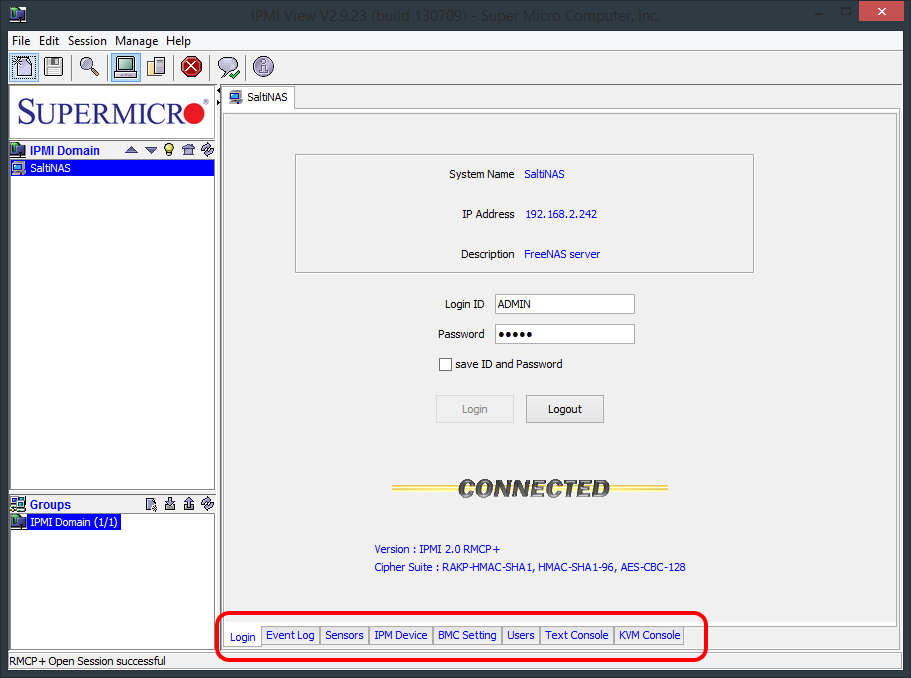
- In the IPMI Domain menu, double click the device then login. Default username and password is “ADMIN” “ADMIN” (all uppercase)

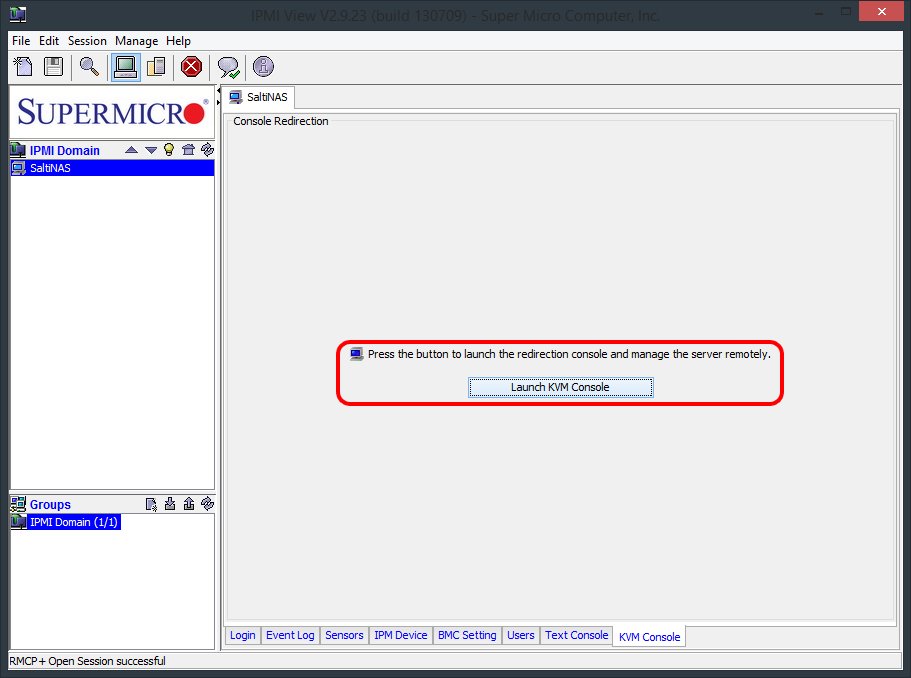
- Once logged in, you will see various options along the menu towards the bottom of the interface.
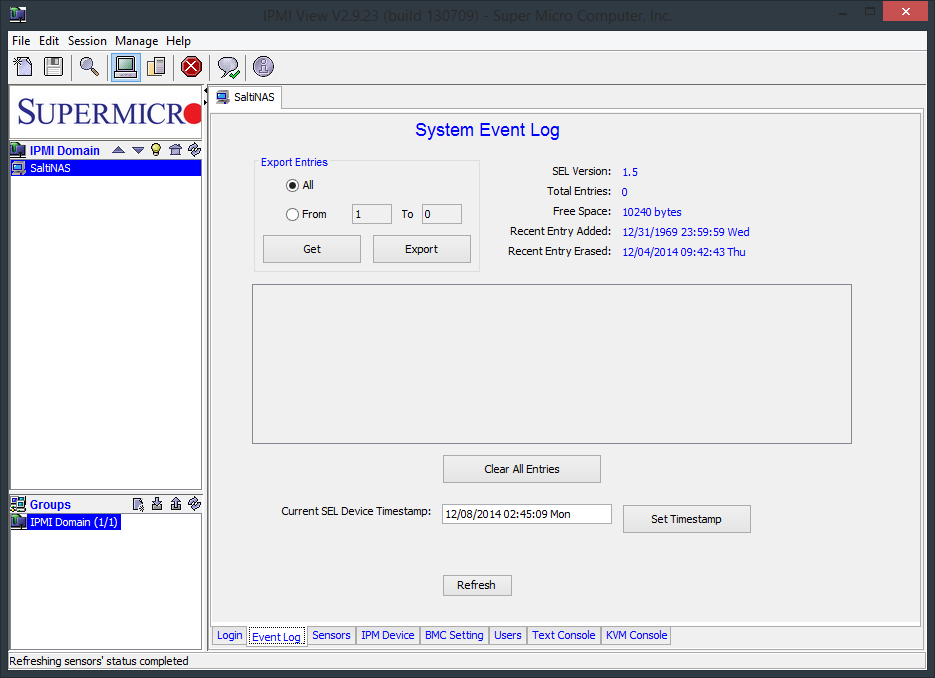
- Event Log: Lets you review the IPMI logs.

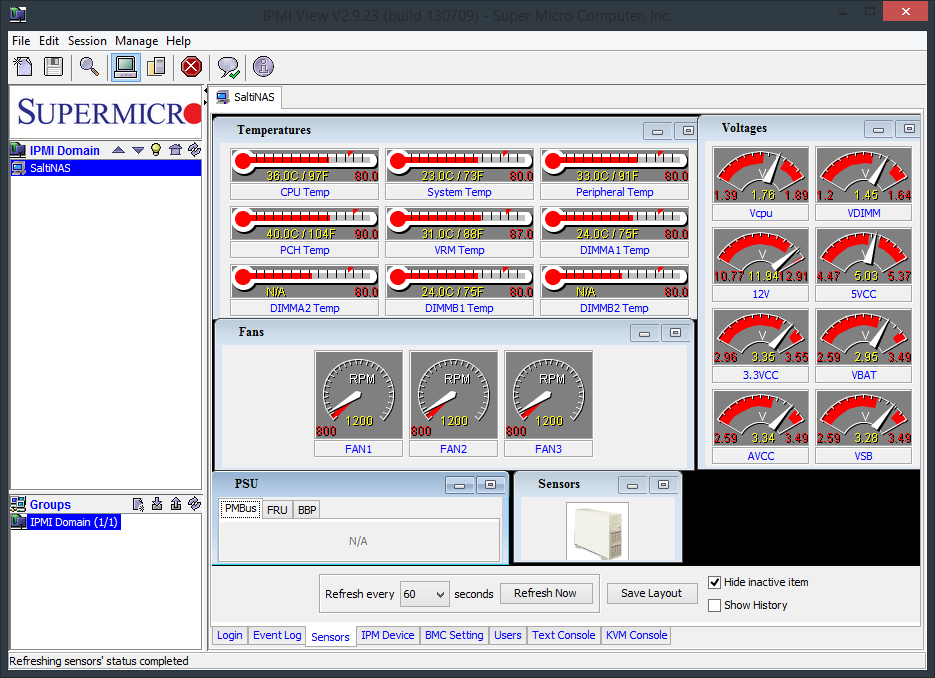
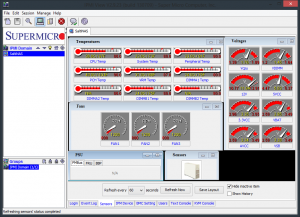
- Sensors: Lets you review output the motherboards sensors.
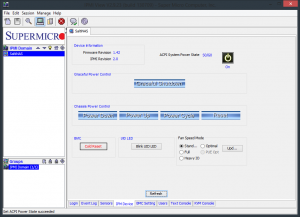
- IPM Device: Power management interface.
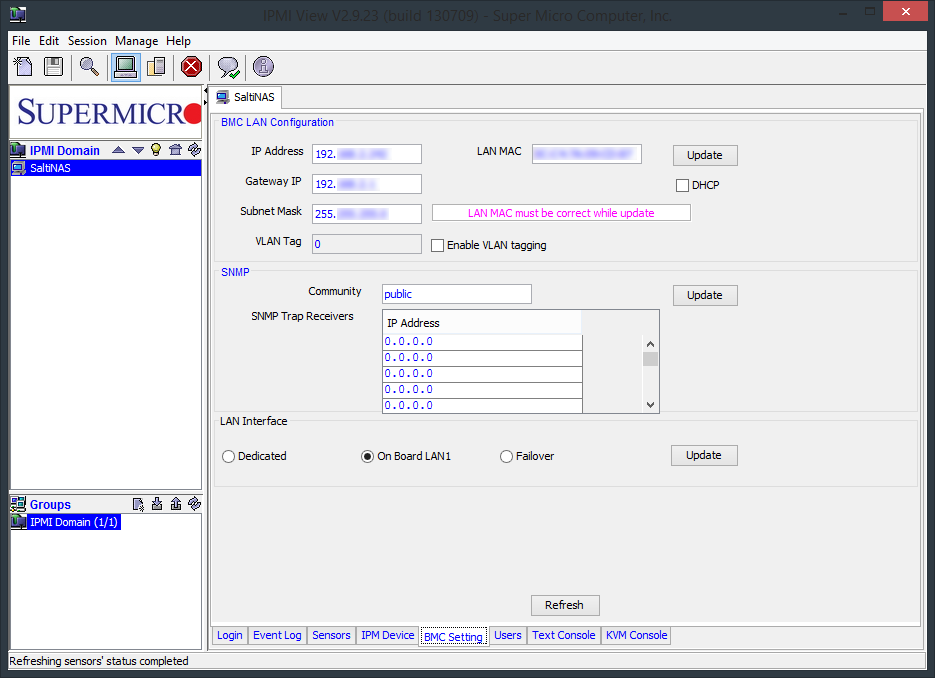
- BMC Setting: This allows you to setup the IPMI netowrk intrface. It is important to pick a LAN Interface rather than ticking to “Failover” configuration.

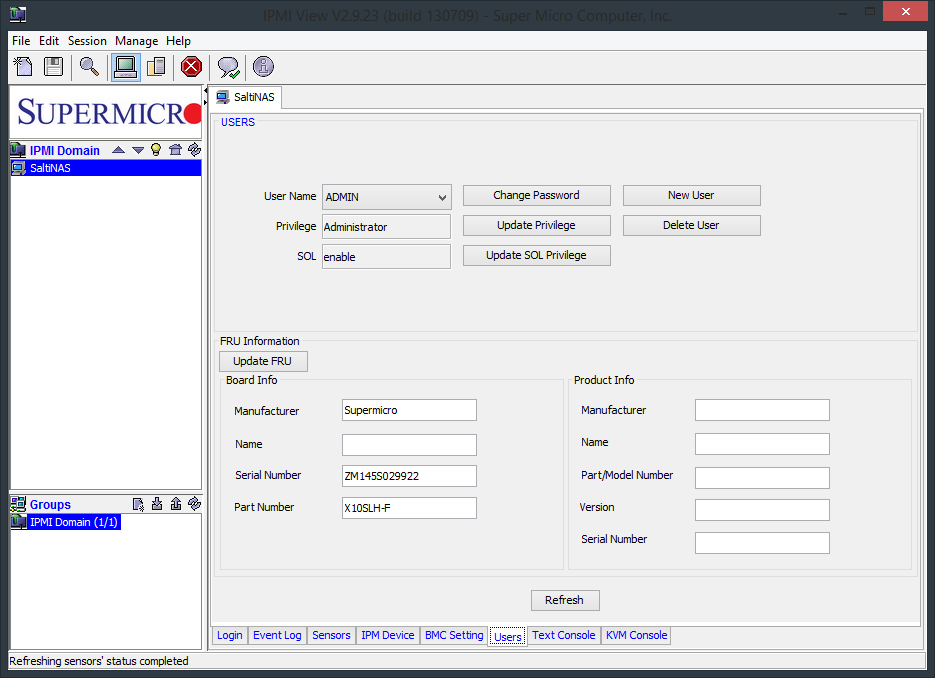
- Users: Allows you to change the user info as well as information about the device

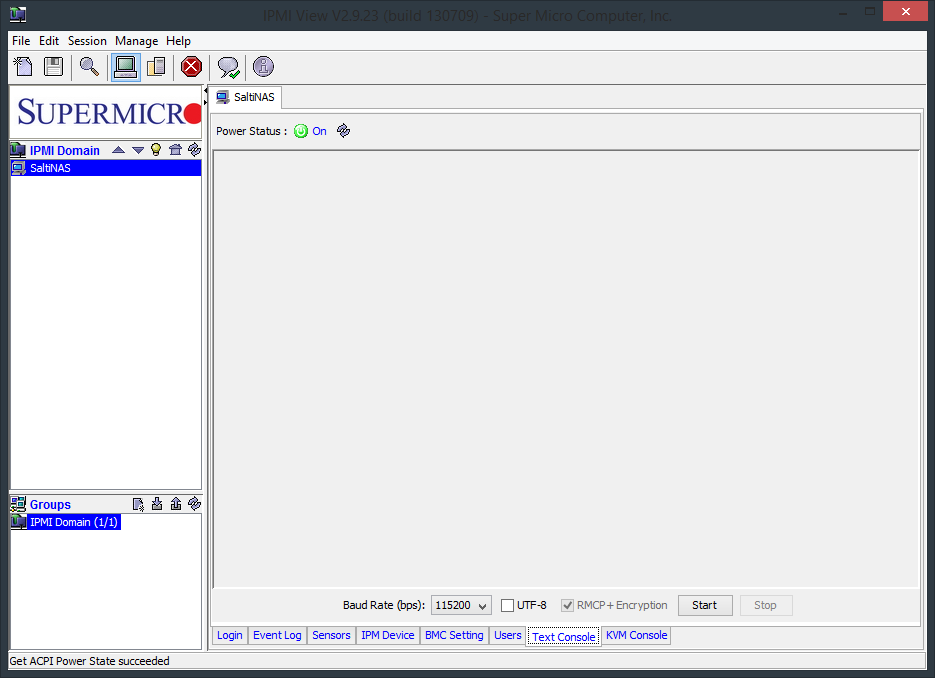
- Text Console: Virtual COM (RS232/RS485)connection to the server.

- KVM Console: Virtual Keyboard Video and Mouse connection to the server. This allows full control of the motherboard and even allows you to serve iso’s or file shares as virtual drives.

- Event Log: Lets you review the IPMI logs.